It has been raining like crazy for the last 24 hours. Two inches so far in the pumpkin patch. I like a good rain, but this is a little too much.
I got my tissue test report back just now. I'm glad I sent it in because what has been going on makes a little more sense now, although some of the numbers are a little surprising. I sent in two leaf stalks on Friday and the lab gave me a pretty detailed report along with recommendations. In the spring I sent in a soil sample and had it tested so I know what my soil had it and I amended it accordingly. The interesting thing is that you can be very high in something like magnesium and get a tissue test and it will show magnesium low in the plant. That will be somewhat explained later.
My soil was high in sulfur, phosphorus and nitrogen in the spring. My tissue test shows low numbers for each of those items. Some of this I can't explain very well. Others I know are being blocked from being taken up by the roots because other nutrients that are a little too high in quantity are taking up the cations or places that they can be absorbed by the roots.
The tissue test also showed I was low for zinc, manganese and copper. Those I'm traditionally low in and apply foliar applications to help with that.
What I'll be doing over the next few weeks is applying regular foliar applications of nitrogen, phosphorus, sulfur, zinc, manganese and iron. I'll also apply some blood meal to the soil to increase the nitrogen.
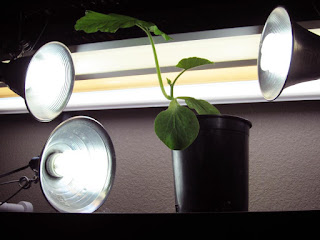
This tissue test explains what I've been seeing in the plants. The lighter colored leaves near the vine tips is from a lack of nitrogen and magnesium. It is more pronounced right now with all of the rain going on because nitrogen and magnesium are hard for the plant to uptake with the saturated soil.
This evening I did an application of fish & seaweed. With all of this rain I don't want to over do it but I also wanted to correct these deficiencies right away to get the pumpkins growing better.

Learn How to Grow a Giant Pumpkin. Competition Giant Pumpkin Seeds, Fertilizers & Growing Tips from Jamie 'The Pumpkin Man'. The Most Read Extreme Gardening, Pumpkin Blog in the World.
Showing posts with label colorado soil. Show all posts
Showing posts with label colorado soil. Show all posts
Wednesday, July 30, 2014
Tuesday, April 15, 2014
Warming the Soil for Planting Time

Clear plastic works best I think to warm the soil. It won't get overly hot like black plastic which could start killing the biology in the soil, but should keep it at a nice moderate temperature.
Saturday, March 22, 2014
Soil Test is Back, Time for Final Prep
Sometime in the next three weeks I'll be putting in my final amendments and tilling the soil. I got my soil test back and things are looking better. Four years ago my soil was pretty jacked up and out of balance. Each year that has improved but I still have a little ways to go. My potassium has been very high for quite some time. Potassium when to high can make it difficult for the plant to absorb calcium and other nutrients so I've been very careful to keep to a limit the amount of potassium that I add to the soil. My potassium is still high but almost half of what it was 3 years ago. That should make a bit of a difference.
Atlantic Giant pumpkin plants are very adaptive to soil types. They seem to have the ability to get at the nutrients they need so if your soil is like mine and not in perfect balance don't sweat it too much.
I've sent off some questions to the soil testing lab but it looks like my final amendments to the soil will be 7 lbs Azomite, 40 lbs gypsum, 10lbs humic acid and 4 lbs evaporated cane sugar.
The following is a link to a simple but excellent website that lists the NPK for most of the most commonly used amendments:
http://www.lundproduce.com/N-P-K-Value-of-Everything.html
Saturday, May 4, 2013
If One Has the Means...Go Barreto, Pumpkin Plants in the Hoop House
 Rototilling a large garden/pumpkin patch isn't a lot of fun. I have about 1,000 square feet to till and my Craftsman tiller does the job but it is a lot of slow work. The Craftsman was having some technical difficulties so I rented a Barreto rear tine, 14 HP mass of tilling power. These units weigh about 600 pounds but are the Cadillac of tillers and make quick work of a pumpkin patch while doing a great job. I was able to to till the entire patch in about 45 minutes and it made quick work of some areas that have traditionally been a little hard and did a good job of tilling in the rye grass I put down last fall.
Before tilling I put down a pound of myco, 2 pounds of blood meal and a couple of pounds of gypsum over the entire patch. After tilling I put down about 12 pounds of winter rye grass seed everywhere but the planting areas. The rye grass cover crop will help keep the weeds down over the next couple of months, get the myco going in the soil and when tilled in will be a nice green manure and add biomass to the soil.
 |
| 1789 Wallace / 1775 Starr |
In about 3 weeks or so I'll take out the plants that I'm not going to go with so I'll then just have one plant in each hoop house and then pray that my keepers can grow a pumpkin.
 |
| 1421 Stelts / 335 Sherber |
I've been real impressed so far the the 1421 Stelts and 1775 Starr plants. Particularly the 1421 has been a vigorous plant with a very nice root system.
I'm tired this evening. Hard work in the pumpkin patch today.
Wednesday, March 21, 2012
Soil Tests are Back; Cation Exchanges
My pumpkin patch soil has been a bit jacked up for a while now in terms of potassium and phosphorus. The numbers have been too high for about 3 years now so I haven't added any potassium or phosphorus to the soil other than what comes with the compost. My latest soil test came back today and potassium and phosphorus are still high but they are coming back down to where I would like to see them. The thing that pleased me the most is cation saturation is pretty much in balance for the first time. Calcium is at 64.4% and magnesium is at 19.8%. Ideally you want those two numbers added up to equal 80% and we are close enough to that. My potassium is high so that will inhibit a little but I think we are okay.
The cation saturation is difficult stuff to understand but basically it can tell you how well the plants can get nutrients from the soil. This article is a nice simplified explanation of how it works. If you are looking for more information you better get your PHD on because there are lots of articles that are over my head.
The cation saturation is difficult stuff to understand but basically it can tell you how well the plants can get nutrients from the soil. This article is a nice simplified explanation of how it works. If you are looking for more information you better get your PHD on because there are lots of articles that are over my head.
Sunday, July 10, 2011
Compost Tea & Pumpkin Leaf Diseases
For the 5th day in a row we have had big rain in Denver. The plants haven't minded it since the hail netting has stopped the hail. Monsoonal flows from the southwest are bringing in warm, moist air into Colorado, which the plants tend to like. The rain storms in my mind have been atypical because things don't cool down as much as usual when it rains and the rain has come in bands where it dumps for 15-20 minutes and then the sun pops back out again. The nights have also been about 3-5 degrees warmer at night too.
The last two days I've started thinking more about leaf diseases like powdery mildew than I normally would this time of year. In August it is typical to get some powdery mildew but if it gets out of control it can slow down your pumpkin growth and even kill the plant. Throughout the season I give my plants an aerated compost tea to help keep a healthy biology on the leaves and in the soil.
An aerated compost tea is just what it sounds like. I take a painters strainer bag and put about 3/4 cup worm castings, along with a leaf or two, some alfalfa meal, molasses and humic acid. That is then placed into a 5 gallon bucket that is full of water that has been sitting for at least 12 hours that has a fish tank hose in it. Attached to the hose is a fish tank air pump that is designed for a 20 gallon fish tank and I have the compost bag suspended in the water above the end of the hose so the air bubbles go up through it. The idea is to build healthy biology (bacteria and fungus) in the water that will be beneficial to the pumpkin plants and soil. By aerating the compost, anaerobic bacteria that are harmful don't develop as much and more beneficial areobic bacteria and fungus blossom. In the end you are pouring a plethora of biology onto the plant which in theory overwhelm the bad stuff in the pumpkin patch, feed the pumpkin plants and give a minimal amount of nutrients.
If you get a bad spot on your lawn sometime try pouring some aerated compost tea on that dead spot and then see what happens over the next 5 days. It is amazing the kinds of results that you can get.
Tonight I gave the plants some compost tea that I've been brewing for about 2 days. Typically I only brew it for about 24 hours but the rainy weather hasn't allowed me to get into the patch much in the evenings.
Wednesday, June 8, 2011
Last Till of the Pumpkin Patch Before the Hoop Houses Come Off
Today I did the final till of the pumpkin patch before taking off the hoop houses. I put down 10 pounds of gypsum for calcium, 4 pounds of magnesium, 3 pounds of blood meal, 3 pounds of sugar and 4 pounds of corn meal meal before I tilled the patch. In the early spring I tilled about half of the patch in the planting areas so I tilled the rest of the patch today staying at least 6 feet away from the plants so not to destroy any roots. I like to do it this way because the soil tends to get a little compacted and crusty on the top by this point of the season from walking around and rain. Colorado's clay soils can get like cement if you let them.
From this point forward I will try to only walk on my walking boards to keep the soil from getting overly compacted for the rest of the season. This helps keeps air in the soil, makes it easier for the roots to grow and allows the water to drain better.
I also gave the plants some compost tea today made with alfalfa pellets, worm castings, humic acid, corn meal and liquid fish & seaweed.
Friday, May 13, 2011
A Little Test with Biotamax
 Last year I tried a new product called Biotamax. Yesterday I decided to do a little test with it on the lawn. Biotamax comes in a tablet form that is full of benefical fungi and bacteria know as soil probiotics. The trichoderma in biotamax can help control plant pathogens in the soil. Esentially they eat the bad stuff and help the plant grow.
My lawn has suffered from a fungus the last two years. Late last summer it appeared that I got it under control but the lawn has never looked very good. I've had soil tests done on the soil so I know the problem isn't nutrient related and there has been a number of mushrooms in the lawn so I believe a fungus is the culprit. After a good 24 hour rain I sprayed Biotamax on the grass to the left of the red pole. to the right I sprayed Spectracide Immunox Desease Control. In two weeks I'll be checking back in to see which part of the lawn is doing better.
Not a very scientific study but it will be interesting to see how a non-chemical fungus control might work.
Sunday, April 10, 2011
Pumpkin Season is Springing Upon Us
Yesterday was the annual Rocky Mountain Giant Vegetable Growers Spring Meeting. It had a great turnout and equally as good weather for the event. Seed exchange, lessons on growing techniques and the latest information on soil probiotics biologicals were shared. Giant pumpkin growers have been using natural fungus and bacteria to help grow bigger pumpkins for years. I've been using things like like endo mycorrhizal fungi for years and this last year I tried new bacteria and fungi like Azos, trichoderma and bacillus. This year I plan on using the same produts (except for maybe Azos that I'm not fully convinced yet that the benefits out way the risks with yet) but on a slightly larger scale covering more of the patch than just the stump area and main vine.
Biota Max's has developed a new tablet form of the biologicals I used last year. In 2010 I used the liquid form and it appears that the tablet will be easier to use and it has more varieties of beneficial bacteria which will be great. The idea behind using beneficial bacteria and fungi are three fold:
Biota Max's has developed a new tablet form of the biologicals I used last year. In 2010 I used the liquid form and it appears that the tablet will be easier to use and it has more varieties of beneficial bacteria which will be great. The idea behind using beneficial bacteria and fungi are three fold:
- Overwhelm the soil with the good stuff so the there is no room in the soil for the bad bacteria and fungus
- Build synergistic relationships between the plant and the soil where the bacteria are fixing nitrogen in the soil and bringing nutrients beyond the reach of the pumpkin plant's roots back to the plant
- Add beneficial bacteria and fungus to the soil that will break down nutrients to a form that the pumpkin plant can use.
- These three things together are often referred to as the soil food web. A healthy soil is balanced, full of beneficial organisms and feeding the pumpkin to help it grow
This week I will be starting my pumpkin seeds for the season. In keeping with the normal pumpkin growers mentality of "more is better" I've added an additional 80watts of grow lights to my seed starting area.
 Today I brought my seed starting mixture (Promix BX), earthworm castings from my worm bins and a little humic acid into the house to begin warming them up so they will be ready for planting time. I'll start my seeds in paper towels and once the tap root comes out I'll put the seed into the soil mixture which will probably be on Saturday. A few days later I should have sprouts coming up and we are off to the races again with great hopes for September and October of this year.
Sunday, March 27, 2011
Doing the Final Spring Soil Pumpkin Patch Prep
In the next three weeks (weather permitting) I will be doing my final pumpkin patch prep before planting. My soil tests came back looking really good except for my potassium which still has numbers through the roof. My calcium and magnesium numbers are about where I want them to be but my soil is out of balance in the base saturation so when I till the soil in the coming weeks I'll be adding some additional calcium and magnesium to get the ratios back into line. When I till I plan to add some Epsom salts (magnesium), gypsum (calcium), a small touch of blood meal (nitrogen), a little manganese and sugar to the patch. That will all be tilled in about 8 inches deep. After that I'll wait a week or so and then put my hoop houses on the patch to help warm up the planting area. I plan on starting my plants around April 15th this year indoors and hope to put the plants outdoors in the soil the first week of May. I saw a press release this last week from NBC stating that The Marriage Ref will begin this year's episodes on June 26th. There might be a pumpkin man on this year's show. Stay tuned for details.
Wednesday, March 2, 2011
Pumpkin Patch Soil Testing
The nice weather we have had for the last couple of days in Denver sent me out into the pumpkin patch to get some soil samples for soil testing. You don't ever know when the soil will be nice and dry again before spring.
To have great soil to grow a giant pumpkin you need to know what is in your soil. A soil test from a trusted lab is the only way to go. Putting on fertilizer and compost without knowing what is in the soil is like shooting in the dark. I am sometimes suprised with the results that I get back in the soil tests because there can be a lot of things that can make NPK to high or to low and without a balanced soil it can be hard to grow a big pumpkin.
I learned from Thad Starr that you have to be kind of careful in how you collect your sample. Take soil samples from multiple spots and use a clean spoon without any rust on it or your test results can be thrown off. A drop of sweat on the soil can change what should have been a normal sodium level in the soil to high sodium levels so you have to be careful what you soil comes in contact with. Take samples from about 6-8 inches down where your roots are going to be so that you know what is going to be available to your pumpkin plant.
Most labs can help you interpet what your soil needs but most labs don't know a lot about giant pumpkins need so ask a grower or post your results on bigpumpkins.com to get advice from other experienced growers.
I like where my soil is at right now. It has a sweet smell and you can see the last remanants of the shredded leaves that I put into the soil last fall. Depending on what my soil test shows I plan on adding three yards of well composted cow manure, humic acid and alfalfa in the next 6 weeks.
Wednesday, September 30, 2009
Fall Patch Prep is Done
 I tilled in the sudan grass today along with about 3 yards of compost and a little gypsum. Didn't need anything else as my NPK is a touch high for everything right now. The middle section of the patch still shows a fair amount of grass popping up because I lost two bolts in the handle of the tiller while I was tilling so I had to go quickly over the remaining area for fear I would break something.
I'm really happy with where the soil is at right now. Much better than where it was at in the spring. The tilth is greatly improved and the organic matter should be much higher. In the Spring I'll add a little more compost from a pile I started this summer.
Friday morning I'm going to sow some winter rye and put clear plastic sheets over it to heat it up and get it growing. Tomorrow night it is supposed to get down to 30 degrees. I'm going to cover the kids pumpkin plant tonight and put a couple of light bulbs under it in the hopes of keeping it alive. It has been making some nice gains the last couple of days and I'd like to keep it going 1.5 more weeks. Right now it is estimating at about 72 pounds which is close to my daughter's personal best of 85 pounds last year. If it can survive tomorrow I'm guessing she and her brother can get it up to 100 pounds.
Monday, September 21, 2009
Compost for the Pumpkin Patch
 I got about 3 1/2 yards of really nice composted cow manure today. It is three-years-old and just perfect for what I need. My nutrients were on the high side in my last soil test. Since then I turned the soil three feet deep so I suspect I am now more in the normal range. This mature compost should add the organic matter I need without adding a lot of extra NPK to the patch.
Friday, September 11, 2009
Sorghum-Sudan Grass As a Green Manure Cover Crop
 The Sorghum-Sudan grass that I planted is a real grower. Warm temperatures have helped push it along. I decided to go with it this year rather than annual rye grass or some of the other commonly used cover crops because I had a little more time to let it grow since my patch prep was started early and I had read some great things about it.
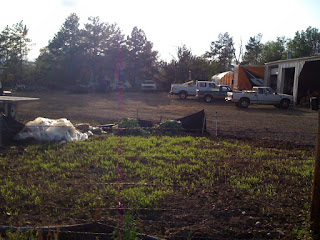
Sudan grass is a warm-season annual grass that is an excellent green manure. It has a high biomass, grows fast (up to 6 feet in Colorado), adds a little nitrogen, blocks out weeds, helps build mycorrhizal fungi in the soil, loosens subbsoil with deep roots and has nematode and disease suppression qualities.
I planted it about two weeks ago and it is already about 3 inches tall.
Sunday, August 30, 2009
Pumpkin Patch Prep in August
 No pumpkins means there is more time to get ready for next year. Yesterday I took patch prep to a new level. Thanks to Chris, owner of CBS Trucking & Excavating and the property that I grow pumpkins on behind my house, we brought out the big guns for the patch prep. Using a backhoe Bob dug down 3 feet deep in the entire patch so we could loosen up the soil deep. There were lots of big rocks that we tossed out of the patch in the process as well. My roto tiller only goes about 8 inches deep and the soil was pretty compacted so the roots were somewhat limited in how deep they could go so loosening up this soil should make a difference.
At about two feet deep we put in a two inch layer of squeegee to help with drainage and to create a hydroponic area for the roots.
 As I understand it Quinn Werner has something like this and he doesn't grow small pumpkins. Helpfully it will help add an extra 100 pounds on my pumpkins next year. After putting the dug out soil on top of the squeegee and leveling it out I put down 6 pounds of soil sulfur, 2 pounds of humic acid, 1 pounds of 7-5-5 organic fertilizer and 5 pounds of 12-0-0 blood meal that Ross at Soil Menders gave to the growers at the patch tour (thanks Ross!). That was then roto tilled in lightly accross the entire patch. I was also going to put in some compost that CBS trucking had but it had disappeared so I'll get some compost and add it in November. In all I think the hard work will pay off. The soil had fluffed up enough to be 6-8 inches higher than it origionally was before the dig.
After roto tilling I put down some sudan grass seed and then racked the
 whole area patch area. Sundan grass is a fast growing grass that is a great green manure. I first heard about it from Joe Jutras and Ron Wallace on the SNGPG video. The grass will grow to 4 feet of more and has roots that will go down as far as 3 feet. They roots help with myco innoculations and will add good organic matter to the patch. I am a little late in the season for this grass but I should be able to get it growing for 6 weeks which will be enough time to get it at least a couple of feet high before the frost hits.
Soil test was sent in last week so that will help me determine what else I need to add to the patch in November. What I have added so far was just spoon feeding and mostly consisted with what I had leftover from this season.
I Started a new compost pile this week as well. The horse manure came from the great grandson of Man of War so hopefully there will be some good growth hormones in it to grow big next year (Lol). I
 also added a bunch of leaves that were leftover from the big storm as well as some grass clippings. It is already heating up nicely and should be ready for final patch prep in April.
Friday, April 24, 2009
Finally, Pumpkin Patch Prep is Complete
 The soil finally got dry enough the I could do the final patch prep. Today I put down some nitrogen to make up for what was loss during the soil flush along with some PAM. PAM is my secret ingredient this year from Wallace Laboratories. To make a long story short, it turns out the manufacturer for PAM is just a mile from my house and I found it by accident. After talking to the owner of the plant and reading the scientific literature I believe PAM can give my soil the structure that it needs which will hopefully translate into big and better root structor. It is fun to watch pumpkin plant vines run and see big leaves, but at the end of the day big pumpkins come as a result of great root systems.
Next steps for the pumpkin patch will be putting down some large sheets of clear plastic to warm the soil and help keep it dry from the coming rain storms and putting the hoop houses into place. Hopefully we will be putting plants into the ground about two weeks from tomorrow.
The picture to the right shows the finished patch. The two stakes are where the plants will be planted.
Monday, March 30, 2009
High Sodium Soil in the Patch
I haven't even planted a pumpkin seed yet and I've already had my first two screw ups of the season. Both came in the form of the same compost manure. The first mistake is not to take a hard look at the amount of phosphorous being added when adding poultry compost to the soil. It actually is a common mistake to look at just the nitrogen levels (which I did) and ignore the phosphorous numbers going into the patch. High phosphorous shouldn't cause the pumpkin plant to much trouble but it probably will cause the myco to be less effective.
The second mistake is that high sodium levels were introduced into the patch with the poultry compost. My fall soil test showed very low sodium levels but the most recent soil test numbers showed the sodium levels through the roof. There is only one source that this much sodium could have come from and that is the poultry compost. I've learned recently that some chickens are given a high phosphorous and salt diet to keep malnutrition away and to plump up the chickens. Apparently that was the case for where my compost came from. I was told the compost was Class I compost but apparently that wasn't the case. The lesson learned is to know the source before it goes into the patch. Joe Jutras had problems with his poultry compost last year too and he still grew a 1507 pound pumpkin. Hopefully I can do some things to fix at least the sodium problem.
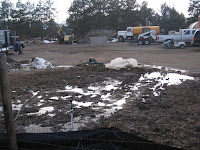 To get the sodium out of the soil I am adding 20lbs of gypsum and flooding the patch with water. Base on some tables from the Colorado Extension service I need about 6 hours of irrigation to flush out the sodium by about 50% in my clay soil. I started that process on one half of my patch yesterday. After everything has dried out I'm going to get another soil test done and see how much nitrogen, potassium and magnesium I need to put back into the patch because those amendments should be somewhat flushed out by the irrigation too.
Sunday, March 22, 2009
Irrigation in the Pumpkin Patch
 I "completed" (except for one broken connection) my patch irrigation system yesterday. It is pretty simple but it will work. I have two sprayers that pretty well cover the patch on each end of the patch. The sprayer is attached to a hose end battery operated timer that will be set to run Monday, Wednesday, Friday morning for 24 minutes. And then every day at 11:00, 1:00 and 3:00 I'll have the timer set to run for 1 minute to cool down the patch in the hot part of summer.
Monday, March 2, 2009
Welcome to March, Warm Weather & Pumpkin Patch Prep Time!
It is looking to be 70 degrees today after a string of warm weather last week and forecasts in the 60s the rest of this week. It is taking all of my will power to not put a seed in the ground. Lots of snow days to come but you wouldn't know it from the weather we are having. I saw two bees flying around yesterday and one of my aspen trees is looking like it is getting ready to bud.
Today I went out in the patch and turned the soil with a spade fork. I sent off a soil sample to the lab last week so I'm hoping to get a report back this week so I can do some final prep while the weather is still so good.
My soil still needs a fair amount of work but it is looking much better than it did in the fall. Depending on what the test results say I'm planning on adding about three more yards of compost to the patch and building some mounded areas where I will be planting. If anyone knows of a good bait shop around Arvada I would like to buy some nightcrawlers to add to the soil. I'm still not seeing any worms in the soil which is a little scary.
Saturday, February 21, 2009
Two Months Until Planting Time
Just two more months until pumpkin planting time. That means that final patch prep and soil analysis will be some of the main tasks over the next 6 weeks. I got two yards of some really good compost today that will be rototilled in around the end of March or the beginning of April. I'll be getting a soil test in the next couple of weeks to find out exactly what I need to put into the soil to get it ready for planting around the first week of May. Rigth now I'm not very happy with the soil tilth and the depth of the soil until I hit hard pack so that will be some of my main focuses. I'll also be building some hoop houses around the end of March which I'll put out around the middle of April to start warming the soil.
Subscribe to:
Posts (Atom)