 I put out my hoop houses today to continue to warm the soil before transplanting. My hoop houses are green house like structures that the plants will stay in until late May to keep them warm and protected from the elements. Ideally I would put the plants into their hoop houses on Saturday but the weather is looking to be bad so I am going hold off until Monday evening. My hoop houses have 2x4 wood bases with a 7.75' x 6.5' dimension. I drilled holes into the 2x4s that are big enough to put 10' long pieces of 3/4 inch white irrigation pipe which is bent from hole to hole to create the hoops. I then put plastic (6 mil or thicker plastic is preferable) over the structure to create the green house for the plants. On warm, windless days I will take the hoop house off the plants. On warm days with some wind I will open up the hoop houses to try to keep the temperature between 80-85 degrees and at the same time keep the plants safe. At night I will have a 60 watt bulb in the hoop house to warm it with a brooder over the bulb so that the light doesn't point towards the plants. You want the plants to rest at night so as little light as possible the better.

Learn How to Grow a Giant Pumpkin. Competition Giant Pumpkin Seeds, Fertilizers & Growing Tips from Jamie 'The Pumpkin Man'. The Most Read Extreme Gardening, Pumpkin Blog in the World.
Thursday, April 30, 2009
Hoop Houses for Pumpkin Plants
I put out my hoop houses today to continue to warm the soil before transplanting. My hoop houses are green house like structures that the plants will stay in until late May to keep them warm and protected from the elements. Ideally I would put the plants into their hoop houses on Saturday but the weather is looking to be bad so I am going hold off until Monday evening. My hoop houses have 2x4 wood bases with a 7.75' x 6.5' dimension. I drilled holes into the 2x4s that are big enough to put 10' long pieces of 3/4 inch white irrigation pipe which is bent from hole to hole to create the hoops. I then put plastic (6 mil or thicker plastic is preferable) over the structure to create the green house for the plants. On warm, windless days I will take the hoop house off the plants. On warm days with some wind I will open up the hoop houses to try to keep the temperature between 80-85 degrees and at the same time keep the plants safe. At night I will have a 60 watt bulb in the hoop house to warm it with a brooder over the bulb so that the light doesn't point towards the plants. You want the plants to rest at night so as little light as possible the better.
Sunday, April 26, 2009


Friday, April 24, 2009
Finally, Pumpkin Patch Prep is Complete
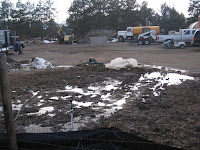
 The soil finally got dry enough the I could do the final patch prep. Today I put down some nitrogen to make up for what was loss during the soil flush along with some PAM. PAM is my secret ingredient this year from Wallace Laboratories. To make a long story short, it turns out the manufacturer for PAM is just a mile from my house and I found it by accident. After talking to the owner of the plant and reading the scientific literature I believe PAM can give my soil the structure that it needs which will hopefully translate into big and better root structor. It is fun to watch pumpkin plant vines run and see big leaves, but at the end of the day big pumpkins come as a result of great root systems.
Next steps for the pumpkin patch will be putting down some large sheets of clear plastic to warm the soil and help keep it dry from the coming rain storms and putting the hoop houses into place. Hopefully we will be putting plants into the ground about two weeks from tomorrow.
The picture to the right shows the finished patch. The two stakes are where the plants will be planted.
Saturday, April 18, 2009
Pumpkin Seed Planting
 Giant pumpkin growers are always searching for great genetics to grow from. Winter time is filled with seed trades and research for which seeds to grow the next season. The most coveted seeds like the 1068 Wallace can go for $750 or more in auction per seed. When you have a good seed you want to make sure it germinates and grows into a nice pumpkin plant. Investing into a seed that doesn't germinate can be very disappointing and potentially costly. To try to mitigate the risk this is what I do when planting Atlantic Giant pumpkin seeds:
- Write the number of the seed with a permanent ink so you don't get your seeds mixed up when planting
- Lightly file the edge of your seed with some sand paper until you just start to see a light brown color coming through. Sanding the seed will help the plant get out of the shell and get it growing sooner. Atlantic Giant seeds can sometimes have tough shells so this helps get the seed off to a good start.
- Soak the seed for 1 hour in warm water with a small drop of liquid seaweed in the water. The soaking will help start the germinating process faster and the cytokinin in the seaweed helps increase germination rates and may help early plant growth.
 Many growers at this point will wrap the seed in a wet paper towel and then watch for the root to come out and then plant in their growing medium but I prefer to plant at this point right away so I don't have to worry about damaging the root. I am using 60% ProMix BX soil less medium for my seed starting mix combined with 40% earthworm castings from my worm bins. Studies have shown that new seedlings thrive in a 40-50% mixture of earthworm castings. This soil has been warmed to 80 degrees for the last 8 hours and then moistened with water so the soil is damp but not wet.
- I then plant the seed into the medium that is in a 9 inch peat pot (wasn't easy to find these nice big pots but I got them at a local garden center) with the pointy part of the seed down 3/4 inch below the surface.
- The peat pots are then placed in a small closet with a thermostatically controlled space heater at 80 degrees (about 84 degrees would be considered perfect but the thermostat on the heater only goes up to 80 degrees).

Wednesday, April 15, 2009
Final Soil Report
I got my soil report the beginning of the week and things are looking much better. The sodium levels are back into the normal range but my phosphorous and potassium levels are still on the high side. I did another soil flush on Monday which will hopefully get my potassium numbers into a more normal range.
Once the soil has dried out I'll add some nitrogen to the soil to get those numbers back up (the nitrogen dropped with the soil flushes) and then we will be ready for roto tilling. After roto tilling I'll put my hoop house over the planting area to begin warming the soil. I'm hoping things start drying out soon. We expect rain here in Denver on Thursday and Friday so I'm going to hold off on planting my seeds for a couple more days to make sure I have time to get my final patch prep completed and the soil warmed before transplanting outdoors.
Once the soil has dried out I'll add some nitrogen to the soil to get those numbers back up (the nitrogen dropped with the soil flushes) and then we will be ready for roto tilling. After roto tilling I'll put my hoop house over the planting area to begin warming the soil. I'm hoping things start drying out soon. We expect rain here in Denver on Thursday and Friday so I'm going to hold off on planting my seeds for a couple more days to make sure I have time to get my final patch prep completed and the soil warmed before transplanting outdoors.
Tuesday, April 7, 2009
Pumpkin Season is Upon Us! Yea!!!
 There is a little known disease that runs rampant around the world in January and February called Orange Fever. Symptoms include: irritability, angry outbursts on pumpkin discussion boards, and cabin fever. If you are not familiar with Orange Fever than you don't grow or live with a giant pumpkin grower.
Winter time is a hard time on pumpkin growers. There are the seed trades, soil seminars and genetic research but that isn't enough to keep the fever away. If anything all of that probably just adds to the fever. Slowly, like ice breaking on a frozen river, the fever breaks and is replaced with pumpkin obsession in Spring time.
Yes, pumpkin season is upon us. Finally! This blog, for those not familiar, is dedicated to the wonder of the giant pumpkin. In it you can find my entire growing season from last year and tips on how to grow big pumpkins. I'm not an expert, yet. But the 755 pounder I grew last year was a great rookie start and if I can get my new soil up to par I hope to get over 1,000 pounds this year.
If you would like to grow a giant pumpkin I can give you some great seeds. Planting time for most growers will be in the next three weeks. With transplanting outdoors, into hoop houses, the first couples of weeks in May.
To answer the most common questions about growing giant pumpkins:
- What do you feed it? Mostly a good composted soil and organic fertilizers. I water 4 times per week for a total of about 1.5 inches or more depending on weather. You want the soil to be lightly moist but not wet between watering.
- How do you move it? This is one was a big concern for me but it really wasn't a big deal. You simply throw a little pumpkin party at the end of the season and have 5-8 friends help you lift it with a lifting tarp. It was really fairly easy.
- What do you do with it when you are done with it? This is really up to you. Most pumpkin growers compost it.
It takes some time and patients to be a giant pumpkin grower, but if you would like to grow a big pumpkin for Halloween it really doesn't take much effort. To get a pumpkin over 100 pounds is really fairly simple with a good Atlantic Giant pumpkin seed. Give it a try this year. You may love it! There is a great pumpkin grower group in Colorado willing to help you or leave a comment below with any questions you may have.
Monday, March 30, 2009
High Sodium Soil in the Patch
I haven't even planted a pumpkin seed yet and I've already had my first two screw ups of the season. Both came in the form of the same compost manure. The first mistake is not to take a hard look at the amount of phosphorous being added when adding poultry compost to the soil. It actually is a common mistake to look at just the nitrogen levels (which I did) and ignore the phosphorous numbers going into the patch. High phosphorous shouldn't cause the pumpkin plant to much trouble but it probably will cause the myco to be less effective.
The second mistake is that high sodium levels were introduced into the patch with the poultry compost. My fall soil test showed very low sodium levels but the most recent soil test numbers showed the sodium levels through the roof. There is only one source that this much sodium could have come from and that is the poultry compost. I've learned recently that some chickens are given a high phosphorous and salt diet to keep malnutrition away and to plump up the chickens. Apparently that was the case for where my compost came from. I was told the compost was Class I compost but apparently that wasn't the case. The lesson learned is to know the source before it goes into the patch. Joe Jutras had problems with his poultry compost last year too and he still grew a 1507 pound pumpkin. Hopefully I can do some things to fix at least the sodium problem.
 To get the sodium out of the soil I am adding 20lbs of gypsum and flooding the patch with water. Base on some tables from the Colorado Extension service I need about 6 hours of irrigation to flush out the sodium by about 50% in my clay soil. I started that process on one half of my patch yesterday. After everything has dried out I'm going to get another soil test done and see how much nitrogen, potassium and magnesium I need to put back into the patch because those amendments should be somewhat flushed out by the irrigation too.
Monday, March 23, 2009
Pumpkin Seed Selection
 This is the Sophia's Choice time of year. The time of year when you have to make the tough choice for what pumpkin seeds to plant. A lot of great growers have been very kind to share some great seeds with me. After doing some pumpkin seed genetic research I have decided to go with the 1566 Rodonis (1450 Wallace x 1231 Pukos), 1450 Wallace (1068 Wallace x Sibb), 1350 Starr (985 Werner x 227 Leland) and the 1363 Werner (985 Werner x 1450 Wallace). There are about 5-6 other seeds, in particular the Van Kooten, Doucet, Grande, Mohr, Hooker, Zaychkowsky and Hunt seeds that I would love to plant but I only have 2 1/2 spaces so choices have to be made. The 1/2 space will be a pollinator which will be my 4-year-old daughter and 2-year-old son's plant. Some of the other seeds that didn't make the cut will see dirt next year, given back to the grower or will be traded.
I like the seeds that I will be planting because they have four main genetic lines that I believe are some of the best. I like the 1068 Wallace genetic lines because no seed has ever performed better with a world record and the second biggest pumpkin grown to date coming from it. The 1231 Pukos is the reverse cross of the 998 Pukos and you have to like those world record genetics. The 985 Werner I think is one of the top seven new super seeds (in my opinion the 1385 Jutras, 1566 Rodonis, 1161 Rodonis, 1350 Starr, 1041 McKie and 1689 Jutras all fit in that class) and may surpass 1068 with time. The 227 Leland has the great old school genetics with the 723 Bobier x 1370 Rose. The 723 Bobier probably was just as good a seed as the 1068 Wallace but was a head of its time in terms of grower technique.
I'm really look forward to this season. If I can get my sodium and phosphorous levels down in my patch some I think I'm in a position this year to get over the 1,000 pound mark. Only time will tell however. Lots can happen in a season.
Sunday, March 22, 2009
Seed Starting Mix Round 3
 Last year I did some experiments with seed starting mix and found that not all starting mediums are equal. This year I tried round 3 of the testing with thee different mediums. I had read how a lot of people liked Fox Farm's Light Warrior soiless medium. I am a big fan of Fox Farm's products so I decided to give it a try. I did three plantings for this test. One with Ligth Warrior, one with Light Warrior plus 20% earthworm castings added in and one with Jiffy Mix soiless mix. After 4 days the Light Warrior with earthworm castings plant came up. After 6 days the Light Warrior plant came up and after 7 days the Jiffy Mix plant came up. In the picture to the right the plant with the earthworm castings is the biggest one, the 2nd biggest is the Light Warrior plant and the smallest plant is the Jiffy Mix plant.
Irrigation in the Pumpkin Patch
 I "completed" (except for one broken connection) my patch irrigation system yesterday. It is pretty simple but it will work. I have two sprayers that pretty well cover the patch on each end of the patch. The sprayer is attached to a hose end battery operated timer that will be set to run Monday, Wednesday, Friday morning for 24 minutes. And then every day at 11:00, 1:00 and 3:00 I'll have the timer set to run for 1 minute to cool down the patch in the hot part of summer.
Pumpkin Grow Light Setup
 After doing a little research I decided that I could do a very inexpensive grow light setup for my pumpkin seed starting that should work as good as the $80 setups that I've seen in the store and online. The setup consists of two 100 watt, 6500K CFL light bulbs from Wal Mart ($4); two brooders ($10); and the timer plug that we use for Christmas lights (already had it so $0). I screwed in the bulbs into the brooders so I could direct the light to the plants and plug the brooders into my christmas light timer so that the lights would run for 14 hours during the day without me having to remember to turn it on or off. The whole setup was placed on a table in a closet so I could better control the temperature. In the closet I place a thermostatically controlled electric heater that I got at Big Lots ($15) that was run at nights when the lights were off to keep the plants at around 80 degrees. At the base of the planting cups I put a wireless thermometer so I could watch the temerature which stayed at a very consistent 75 degrees. Closer to the bulbs where the plants leaves were located it was about 81 degrees. My test planting proved to be very effective with all of the pumpkin plants coming up and growing nicley.
Saturday, March 7, 2009
Back in the Patch Again
Someone didn't tell mother nature that it is still winter, but I have been enjoying getting out into the patch again in 70 degree weather. Over the last two days I have been roto tillig and pouring compost tea over the patch. My initial tilling in the fall didn't get me nearly as deep as I wanted to go because the ground was so compacted so I have been letting the tiller run as deep as I can. The soil is looking much better than it did in the fall. Better tilth and lots of nice organic pieces in the soil. I don't expect my soil to be perfect this year (it takes a while for everything to break down and for the biology to build in the soil) but I think I will be good enough. I have a little more tilling to do and then I am going to wait until my soil analysis gets back to see if I need to add anything else. After the last analysis I will till the soil again going in a perpendicular direction to what I went last time in final preparation for planting.
Monday, March 2, 2009
Welcome to March, Warm Weather & Pumpkin Patch Prep Time!
It is looking to be 70 degrees today after a string of warm weather last week and forecasts in the 60s the rest of this week. It is taking all of my will power to not put a seed in the ground. Lots of snow days to come but you wouldn't know it from the weather we are having. I saw two bees flying around yesterday and one of my aspen trees is looking like it is getting ready to bud.
Today I went out in the patch and turned the soil with a spade fork. I sent off a soil sample to the lab last week so I'm hoping to get a report back this week so I can do some final prep while the weather is still so good.
My soil still needs a fair amount of work but it is looking much better than it did in the fall. Depending on what the test results say I'm planning on adding about three more yards of compost to the patch and building some mounded areas where I will be planting. If anyone knows of a good bait shop around Arvada I would like to buy some nightcrawlers to add to the soil. I'm still not seeing any worms in the soil which is a little scary.
Saturday, February 21, 2009
Two Months Until Planting Time
Just two more months until pumpkin planting time. That means that final patch prep and soil analysis will be some of the main tasks over the next 6 weeks. I got two yards of some really good compost today that will be rototilled in around the end of March or the beginning of April. I'll be getting a soil test in the next couple of weeks to find out exactly what I need to put into the soil to get it ready for planting around the first week of May. Rigth now I'm not very happy with the soil tilth and the depth of the soil until I hit hard pack so that will be some of my main focuses. I'll also be building some hoop houses around the end of March which I'll put out around the middle of April to start warming the soil.
Saturday, January 17, 2009
Top Producing Pumpkin Seeds
Using the data on pumpkinlink.com I pulled a report to find out for a given seed what the total number of pumpkins over 1,000 pounds where as compared to the number of seeds grown. These two numbers give you a percentage of pumpkins grown over 1,000 pounds. This number is significant because it gives a grower an idea of the likelihood that a seed will produce a big pumpkin based on past results. The following is a snippet of the results. Full results can be found on the pumpkinlink.com homepage.
Seed | Percent over 1000+ pounds
1068 Wallace 75%
1689 Jutras 70%
1566 Rodonis 69%
500 Wallace 67%
1041.5 Mckie 64%
998.6 Pukos 60%
1450 Wallace 60%
Seed | Percent over 1000+ pounds
1068 Wallace 75%
1689 Jutras 70%
1566 Rodonis 69%
500 Wallace 67%
1041.5 Mckie 64%
998.6 Pukos 60%
1450 Wallace 60%
Friday, January 16, 2009
Worm Castings & the Wife
A while ago I suggested to my wife that I'd like to get some worms to collect worm castings for the pumpkin patch. Worm casting are rich in microbial activity and put fertilizers and minerals into a form that plants can readily absorb. I have to admit there wasn't full disclosure before our marriage about things like compost, worm castings and pumpkins. I didn't start to grow pumpkins until a few years after our marriage. The conversations didn't go well in regards to the worms needless to say. If you ever read Amber's blog you would know. There were some concerns, however unfounded. Things like smells and worms running around the house at the top of her list.
Not to challenge the marriage, but as a little experiment I got the worms. Will, a grower in Colorado Springs, was kind enough to give me a few of his 1.5 million composting worms. They are now sitting in a garage tote bin with a lid on it. We will now find out how often Amber either reads my blog (I don't blame her for not reading it often because if you don't grow pumpkins it has to be really boring), can "smell" the worms or stumbles upon the bin. Details to come.
Not to challenge the marriage, but as a little experiment I got the worms. Will, a grower in Colorado Springs, was kind enough to give me a few of his 1.5 million composting worms. They are now sitting in a garage tote bin with a lid on it. We will now find out how often Amber either reads my blog (I don't blame her for not reading it often because if you don't grow pumpkins it has to be really boring), can "smell" the worms or stumbles upon the bin. Details to come.
Sunday, January 11, 2009
New 2009 Pumpkin Seed Lineup
Okay, I said I wouldn't change my mind about my seed lineup but I did. A very kind grower sent me some additional seeds that rocked my lineup. I now plan on growing the following:
1566 Rodonis (1450 Wallace x 1231 Pukos)
1450 Wallace (1068 Wallace x sib) - thanks Thad!
1363 Werner (985 Werner x 1450 Wallace)
1528 Starr (1350 Starr x 1041.5 Mckie)
Trying to decide the crosses for these seeds make my head spin. At this point the following are my best thoughts. Let me know if you have any suggestions.
1566 Rodonis x 986 Pukos (pollen from another grower)
1528 Starr x 1566 Rodonis
1450 Wallace x 1363 Werner
1363 Werner x 1566 Rodonis
Saturday, January 10, 2009
Composting for Your Pumpkin Patch
The best stuff that I believe you can put into your pumpkin patch is compost. I'm no expert on composting but there really isn't to much too it. Basically I like to take manure, alfalfa pellets, leaves and build them up into a nicely layered pile. I then spread some organic fertilizer in the pile (I used some leftover Happy Frog brand fertilizer that has some bacteria in the mix) and then poured 5 gallons of compost tea over it to help heat it up quickly (this step isn't necessary, but I think it might help the process go faster). The heat in the compost pile is generated by mesophilic microorganisms which rapidly break down the soluble, readily degradable compounds. The heat they produce causes the compost temperature to rapidly rise.
As the temperature rises above about 103°F, the mesophilic microorganisms become less competitive and are replaced by others that are thermophilic, or heat-loving. During the thermophilic phase, high temperatures accelerate the breakdown of proteins, fats, and complex carbohydrates like cellulose and hemicellulose, the major structural molecules in plants. As the supply of these high-energy compounds becomes exhausted, the compost temperature gradually decreases and mesophilic microorganisms once again take over for the final phase of "curing" or maturation of the remaining organic matter.
You should turn or lightly mix the compost about once every two weeks to keep this process going so the available nitorgen becomes available to the bacteria. Adding a little water to the pile during dry periods can also help with the breakdown of the materials in the pile. After about 6 months the compost is usually ready to be tilled into the soil if you don't plan on eating your pumpkin. If you are planning on eating it you may want to wait up to a year.
Wednesday, January 7, 2009
Pumpkin Link - A New Online Pumpkin Seed Genetic Cross Search Tool
I created a new pumpkin website. It is at http://www.pumpkinlink.com/. The website gives Atlantic Giant pumpkin growers the ability to search pumpkin family trees. This tool is a great research tool for growers to help them plan which seeds they would like to plant because they can search by pollinators, crosses, weight and grower. Over 8,900 pumpkins are in the database. Choosing the right seed is an important step to growing a really big pumpkin.
Wednesday, December 31, 2008
The (Pumpkin) Iceman Cometh
 While in Canada for the Holidays with my inlaws the Iceman was was kind enough to swing by and pick me up and take me out to his home and pumpkin patch. Eddy is a super nice guy and I really enjoyed time with him talking everything pumpkins and touring his 4 acre property. Eddy's seed collection is extensive (to put it mildly) and his generosity is legendary. He has at least 4 large boxes full of great and classic seeds and his patch setup is very impressive.
Eddy grew a 1011 pound pumpkin two years ago which beyond impressive. When you live in a place with a short growing season, cool days and cold nights you have to do something special. Especially when there is a risk of snow as late as June. Eddy has 6 green houses with an additional one being built that has heating cables throughout the ground, diesel powered heaters, and an extensive watering system. That is the only way a person could grow a pumpkin that far north and at that altitude. It was fun comparing challenges of growing in Colorado and Alberta
 and what needs to be done to grow in high altitude locations. Got some good ideas from the Iceman that I'm going to try next year.
Even with the extensive seed collection that Eddy has he has decided to start growing his own seed lines and he is starting with the classics. He has acquired some of the best seeds from 7 to 12 years ago and he is going to start with some of the origional genetic lines in the hopes of creating some powerful seeds with some very interesting crosses. It will fun to watch to see what happens in Alberta over the next few years.
Thanks for the time and the advice Eddy!
Subscribe to:
Posts (Atom)