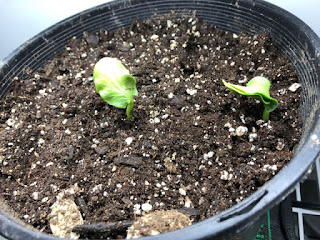
Saturday, April 29, 2017

How to build a Hoop House & Cold Protection for Pumpkin Plants

Yesterday I completed the hoop houses for the patch.  Similar setup for them that I've used in the past, although every year I get a little better at it.  Joe Jutras might not find my work up to par, but they are good enough.

I start with a simple frame using redwood 2x4s using stainless steel screws to put it together  On the corners I add braces using leftover pieces from the frame.  

I then drill holes for the pipe on the sides and a hole in the center of the hoop house door area.  I then put 1/2" pvc pipe through the holes that I then put end caps on.   I put a vertical pipe through the center of the door area that has a 90 degree connector at the top (not pictured).  Into the other end of the connector I run a horizontal "cross bar" under the hoops that gives them some support at the top of the hoop house.   I then use a zip tie to connect each hoop to the cross bar. All of this makes for a pretty sturdy frame for the plastic cover.

Next, I use clear 6 mil plastic to runs across the hoops.   The plastic is then stapled to the wood frame.   Using the same 6 mil plastic I put "doors" on each end that are stapled to the frame and using plastic clamps I clip the door to the outside hoops.

I've had hoop houses like these in snow, heavy wind and rain.  A 100 watt incandesent bulb, heat lamp or space heater inside the hoops at night will keep the plants warm (and not let them freeze).  The plastic gives no cold protection at night, but if the doors are closed, they heat up very quickly when the sun is out, so you have to monitor temperatures.

This morning I plug in the soil heating cables for the first time.  I had some clear plastic over the planting areas.  There was some ice on the plastic.   Just now I checked the temperature 8 inches into the ground.  The one hoop house soil was at a very nice 73.4 degrees and the other was at 66.7 degrees.   By Wednesday, when I plan on putting the plants in the ground, the soil temperature should be perfect for them.  You don't want to put your plants into a cold ground.  

The plants are vining right now and I'm very anxious to get them into the ground.


Sunday, April 23, 2017

Heating Cables for The Pumpkin Patch

Yesterday I nearly killed myself off doing the final preparations in the pumpkin patches.   It took 7 hours to get everything done.  If I had taken 1 hour to take a math class or asked my 10 year old son to do some basic calculations (the kid is a math wiz) I could have probably cut that time in half.  lol

The weather yesterday had been the best it has been all year.  I noticed the forecast was for rain/snow from Sunday to Friday so I knew I wouldn't be able to get everything done in the patch before May 1st (my target date to get the plants in the soil) later in the week, so I had to get everything done yesterday. 

First order of business was to put in the soil heating cables.  Everyone I've ever known to have used soil heating cables told me the same thing.  The plants that had them were always bigger than the plants that did not. Because my nighttime summer temperatures are going to be pretty cool at night, I thought the soil heating cables would be a great idea to help the plants overcome their environment.  These cables have a thermostat and will warm the soil to about 75 degrees.

My cables are 48 feet long and the packaging says they cover 12 square feet.   So I of course dug out a 12x12 foot area about 5-8 inches deep.  Now simple math would tell you that 12x12 is 144 square feet, not 12 square feet, so I pretty much overdid it on the digging (and it was a lot of work).  The good news is that the soil is loose deep in a nice, big area now.

soil heating cables
After digging the area out I decided to amend the soil with a little nitrogen, alfalfa, kelp, humic acid and sulfur and tilled that into the soil.   My tiller goes 8 inches deep so this loosened up the soil an additional 8 inches.  I then put down the heating cables and filled in the hole.

After doing that I tilled the patch again (previously I did it quickly, so I wanted to hit some areas again that the winter rye didn't get fully tilled in) and then I put down some new rye grass seed in all parts of the patch, except for a 10x10 area were I'll be planting the plants.  The grass seed will be tilled in June and will help keep the soil from getting compacted, suppress weeds, help get the myco going in the soil and add organic matter to the soil.

After that I raked the rye seed into the soil and then watered the entire patch.   I'm putting clear plastic over the planting areas today to help warm the soil and keep it dry from the rain that will be falling this next week.   You don't want to put your plants into wet, cold soil and that clear plastic can help warm it up 5-10 degrees.   When I finish the hoop houses I'll put them over the planting area this week as well.

After that I started the whole process on patch 1.  This time, being wiser, I dug the area 4x4. Just as it was getting dark I had everything completed.

I'm happy now, for the most part, with where things are at with the patch.  Soil tilth in patch 2 is great right now.   Patch 1 is coming along, but there are a few compacted areas that I still need to get loosened up.  The soil is in good shape in the planting area however, so when I till in the rye grass in June, I'll work those hard spots out and we should be in good shape.


Saturday, April 22, 2017

The Pumpkin Plants

I'm happy with the growth on my plants but not the color.   I think they aren't getting enough sun and since I'm keeping these plants in their pots longer than I have ever before, I'm concerned they may start getting low on nutrients.   Weather her has been windy and cool, so I haven't been able to get the plants outside for more than 20 minutes and they have only been outside twice.  The color is greenish-yellow so I'm not sure if that a light issue or a nutrient issue. 

Today I did something I've never done before while the plants are in the pots.  I gave them a very small amount of fertilizer and seaweed.   Today it is cool, but sunny and little wind so far so I have the plants outside.  Hopefully that will make they a little happier.
774 Johnson

1685 Sherber

Friday, April 21, 2017

Grow Closet is Getting Full

I run into this problem every year, but this year it is worse than in the past because I started my pumpkin seeds earlier than most years.   Things in the grow closet are starting to get a little tight with leaves starting to touch together and I still have another 10 days until I want to plant outdoors.

Weather here in Midway, UT hasn't been very warm.  Night time low temperatures are still hovering close to freezing.  I can keep the plants from freezing, but it wouldn't be ideal.

The other problem that I have is that I don't have my irrigation system in place and I won't be doing that until April 29th.   I can work around the hoop houses, but it would be better to have all the water lines in before I put the plants outside.

Thursday, April 20, 2017

Getting Techy in the Pumpkin Patch

We've got an app for that!  Actually we've got a couple of them. 


In the new pumpkin patch I'm putting in a little technology to make things easier and better.   When we moved to the new house the outdoor temperature gauge was broken so I hoped on eBay and found a new one (open boxed special).  This one has three wireless sensors and has an app that allows me to check the temperatures from anywhere in the world.  I'll use these in my hoop houses to make sure it isn't getting too hot or too cold.  It will even send me alerts if it goes below a certain temperature or above a certain temperature.  Right now I have one in my grow closet, so I can monitor the temperature for my plants.  It is a very nice 84.2 degrees currently.

I'm also using the PlantLink soil monitoring devices this year.  I actually got them for Christmas over a year ago, but since I didn't grow last year I didn't use them.   These wireless devices monitor soil moisture and give specific recommendations based on weather and type of plant.   From what I can gather I'll want to be on the high side of their recommendations.   It also has a phone app that will allow me to watch the watering while I'm away.  At one time they were going to come out with some valves that you can remotely turn the water on with, but I've never seen them for sale.

I got the PlantLink after in two different seasons I had watering problems.  One year the pump on the well stopped working and the plants got dry and my big pumpkin got a dill ring three days later and split shortly after that.   Last year my timer wasn't working right and I didn't know it.  The result was the plants were getting watered for a week about 1/10th of what they should have and the plants got damaged.  

PlantLink seemed like a really promising company a couple of years ago.  They were bought out by Scotts and seem to have gone kind of dormant since.  As long as I can get some kind of indication for where the soil moisture is at I'll be happy to use it to help perfect my watering.


Wednesday, April 19, 2017

Seed Starting Mix with Coco Coir Giving Horrible Results

I had mentioned before that I didn't have enough ProMix BX to start all of the plants in so I tried a coco coir seed starting mix for a few of the plants.  At first I thought 3 plants were just a little slow getting going, but now it is obvious that the plants started in the coco coir are the ones that are stunted.   Wish I could remember what brand I used, because I know some people start seeds in coco coir without problems, but these plants have obvious problems.   I gave them a mild fertilizer today, because I have to believe the issue is nutrient based.  Most seed starting mixes have very little in them, so I don't know what the issue would be with this coco coir, but I won't use it ever again.

If any Utah grower knows of a place to buy ProMix please let me know.   

Friday, April 14, 2017

Amending the Pumpkin Patch

Using the soil test report that I got a couple of weeks ago I amended and tilled my soil.   Getting the soil balanced with all of the nutrients the plant will need is very important.  The most important things you do in your pumpkin patch to grow a giant are done before you even put your plant in the ground.   If the soil has poor tilth, compacted or missing nutrients then there is little to no chance of getting a pumpkin over 1,000 lbs at the end of the season.

One thing you don't want to do is over do it for the amendments.  You have to consider all sources when amending.  For example, maple leaves can have a lot of calcium in them.   If you till in a bunch of leaves in the fall, but your soil already had adequate calcium, you could end up with too much calcium in the soil.   Calcium can be antagonistic to the uptake of potassium and typically there is a lot of potassium in a pumpkin so the end result is a smaller pumpkin.  Know what is in everything you amend with and you should be in good shape.

The following are what I amended my soil with yesterday.  For some amendments, I put down about 70% of what the soil needs, because things like nitrogen can leach out of the soil over time, so I'll add the last 30% in smaller divided doses starting in two months or so.  Other amendments like manganese and phosphorous aren't mobile in the soil, so I needed them fully added now, because if you put them on the top of the soil they won't move down through the soil to get to the roots very well.

The following is the full list of what I amended my soil with:

compost (nitrogen, phosphorous, potassium, organic matter)


mono ammonium phosphate (nitrogen / phosphorous)
alfalfa (nitrogen, phosphorous, potassium, organic matter)
ammonium sulfate (nitrogen)
elemental sulfur (to lower pH of soil)
zinc
copper
manganese
boron
magnesium
expanded shale
humid acid
peat moss
kelp meal (potassium and growth hormones)

When I tilled in the soil it also tilled in the cover crop of winter rye that I had planted in the fall.  That will help add organic matter to the soil (a green manure).
 

Wednesday, April 5, 2017

The Best Seed Starting Mix for Giant Pumpkin Seeds

Sometimes I get asked what I use for my seed starting mixture.  If you dig deep enough into this blog you'll see that I've done testing with different seed start mixtures.   I prefer a soil less mixture.  Some of the best genetic pumpkin seeds can be hard to come by so I prefer a medium other than soil so I can be sure that no pathogens are in the mixture.  Pro Mix BX is my favorite seed starting mixture, but so far it has been hard to find in Utah.  I had one bag, but that wasn't enough for my two pots, so I'm trying coco hair this time in a couple of pots, which I've read good thing about.  

In my pots I'll add some humic acid, NPK Industries Microbes Grow formula and this year I also added some Lebanon Turf Roots (I bought it for the landscaping plants I've started indoors).   In those two substances there is a good mixture of myco and beneficial bacteria along with micro amounts of different nutrients.   I don't put any fertilizer in the pots.   Everything the plant will need for three weeks are in the seed starting mixture and fertilizer is not necessary.  I won't give the pumpkin plants any fertilizer until they are planted outdoors in the soil.  Actually I do give the plants some diluted kelp in the pots, but that is about it.

Lighting Up the "Grow Closet" & the Pumpkin Season has Begun!

We are off and running! Seeds are soaking as we speak and the new "grow closet" is fired up.   In the new house I put two closets in my office.  The one closet is a typical office closet and the other closet is dedicated to pumpkins.   I turned on all the lights for the first time today.   The temperature is thermostatically controlled in the closet for the perfect environment.  We should have enough lumens here to get some good pumpkin plants started.

Tuesday, April 4, 2017

This Just In; Starting Seeds Early This Year

After watching the UGPG webinar last night, I realized I'm not on my game this year.  Being in a new home there is a lot of things going on in getting not only the pumpkin patch setup but all of the landscaping.   Its a lot of work just to plan, more or less actually do.  Matt McConkie shared a lot of good ideas and one of the things he talked about was the number of days the plant will grow.   The weigh-off is September 23rd this year which is pretty early.   That means we season is a week shorter.  Normally I'll get my seeds started around the 15th, but that would leave me with a pretty short growing season.   Instead I'm going to start my seeds on the 6th, which should be enough time to get close to full growth on the pumpkin. 

The problem that creates is planting the pumpkin outdoors.  Last frost in Midway, Utah isn't until the first week of June.  That means a number of cold nights and slow growth.   What I think I'm going to do is try to keep the plants indoors as long as I can.   I'll need bigger pots to make that work, but if I'm going to get the number of growing days that I need it is the only way I can maximize the early season growth.   Hopefully that will work out and it will be a warm spring.

From past experience, I've found that early season growth isn't completely important.   I've seen in my own experience cold, wet springs with almost no sun (in May two years ago I think the sun came out three times the entire month) and even though growth is stunted early, when it finally warms up the plants can catch up fairly quickly and you can still have giant pumpkins as long as the summer weather is good.

Sunday, April 2, 2017

2017 Giant Pumpkin Fertilizer Program

The following is a modification of my "secret" giant pumpkin fertilizing program.  The soil requirements for this new pumpkin patch is much different than my old patch, so I've made some changes.  In addition to what is listed below, I'll also be putting down a little Azos, myko, kelp and Humic acid to each leaf node.  What is listed below doesn't include what I amended the soil with in the Fall and Spring.  Most of the fertilizers and nutrients products are NPK Industries' RAW fertilizers.


May planting outdoors in hoop houses:
Week 1B-vitamin, liquid seaweed/kelp, compost tea. With RAW Microbes and Azos in the planting hole.
Week 2RAW phosphorous, compost tea, fulvic acid, yucca, silica, Biotamax
Week 3compost tea, foliar seaweed, foliar humic acid
Week 4compost tea, fish & seaweed, Azos, Actinovate with iron, omina, silica

June vine running:
Week 5blood meal (for nitrate nitrogen), compost tea, yucca, TKO
Week 6foliar multi-mineral, yucca, foliar seaweed, fulvic acid, RAW Flower, Omina
Week 7foliar humic acid, compost tea (pollination)
Week 8foliar multi-mineral, foliar seaweed, foliar humic acid, yucca, potassium 

July fruit (assumed that pumpkin pollination will be around the last week of June):
Week 9foliar potassium, omina, seaweed
Week 10foliar fish & seaweed, foliar multimineral, B-vitamins, RAW Flower
Week 11TKO, foliar fish & seaweed, biotamax, actinovate
Week 12cane molasses, foliar multi-mineral, RAW Grow, foliar humic acid/seaweed

August 
Week 13Omina, Raw Flower, foliar multi-mineral, compost tea, silica, foliar actinovate, B-vitamins, RAW Microbes
Week 14potassium, Actinovate, azos, yucca, foliar fish & seaweed, foliar humic acid
Week 15foliar multi-mineral, foliar fish & seaweed, foliar humic acid, silica, RAW Grow
Week 16TKO, cane molasses, fish & seaweed on the soil, foliar seaweed, fulvic acid

September
Week 17foliar multi-mineral, foliar fish seaweed, foliar humic acid, B-vitamins, RAW Flower
Week 18TKO, foliar seaweed, foliar humic acid, cane molasses, silica, mono ammonium phosphate
Week 19potassium, foliar seaweed, foliar humic acid
Week 20foliar potassium, foliar seaweed, foliar humic acid

Saturday, April 1, 2017

The Little Known Secret of Mycorrhizae

If you haven't heard of mycorrhizae (myco), beneficial fungi, microbes or beneficial bacteria then you might be missing out.  In a teaspoon of soil there are more bacteria and fungi than all of the people on earth.  Most plants couldn't live without them.   By building biology in your soil with a healthy balance of beneficial bacteria and fungi you can grow bigger pumpkins, healthier lawns and have a better garden.

One of the better known beneficial fungi is called mycorrhizal fungi.  These microscopic guys can produce a symbiotic relationship with the roots of your plant and as a result bring extra water and phosphorous to your plant.   You could literally double what the roots alone could do with myco.

What many growers don't know is that it can take a month or so for your myco to mature to the point that they are providing much benefit to the plant.  One prominent myco producer somewhat quietly once told me that there may be some benefit in starting myco in pots three to four weeks prior to your planting of your actual plants.  Because of this, each year I start a test planting with a couple of seeds in a pot that I have pre-added myco and other beneficial bacteria to.  In two more weeks, when I start my pumpkin seeds, I'll pull these plants out of their pots and mix the soil from this pots in my pumpkin pots.

This year I used NPK Industries' RAW Microbes Grow Stage.  It has four different types of myco along with five different types of beneficial bacteria.  One of the reasons I'm using RAW Microbes is because if you were to test some of the different popular products on the market you would find that in some cases the spores aren't viable or you aren't buying what is on the label.  NPK Industries double tests their product.  Let me know if you are interested in this product.