When we decided to move to Midway two years ago, I immediately decided that I would need a greenhouse to grow a pumpkin of any size. Overnight lows in the low 50s in July and a growing season that is literally a month shorter than Denver's (which isn't very long) I knew it would make it a challenge to grow a pumpkin that is 1,500+ pounds.
Last season I realized it was worse than I thought. High minds plague my area and I saw considerable damage to the plants as a result.
To my rescue, Ralph Luab came. He didn't know it, but he had just what I needed. He was kind enough in early June to bring me some pollen from one of his plants because it was looking like I wasn't going to have pollen available to pollinate a female that was going to be opening the next day. He came all the way from Vernal to help me out. When he arrived I showed him the patch and was complaining about the terrible winds we had had for the previous two weeks and how beat up my plants looked as a result. He said, "I've got the same problem in Vernal. I found a government program that pretty close to gave me a free high tunnel." My ears perked up and I immediately said, "Do tell."
He then began to tell me about a conservation arm of the federal government called the NRCS that does financial assistance for high tunnels.

A high tunnel is basically a greenhouse, but without power. For the program you basically have to do a lot of paperwork and if approved they cover about 95% of the cost for the high tunnel. Budgets change year to year for the NRCS, but for my NRCS office I think there were about 12 people that applied in the previous group, initially 10 were approved and then they got some more funding, so they were able to get everyone that applied a high tunnel.
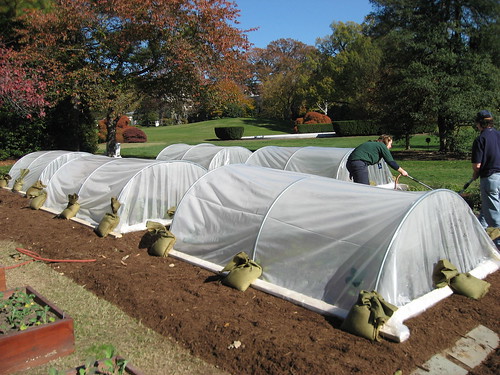
I filled out the paperwork and in the end of November the deadline ended and then after some more paperwork and a site check I found out this last week I was approved and signed the contract for my high tunnel. I'll be installing a 24x32 high tunnel which will have enough room for one plant and I should get funded this next month. Pictured to the right is a larger version of the same one I'm getting.
Why would the government do a program like this? I don't know all of the details. I know part of it is for land conversation and I know another is to get more people farming, either in their neighborhood backyard or on larger agricultural farms. I was told when signing the final paperwork for a high tunnel this last week that the High Tunnel System Initiative came from Michelle Obama. As you may recall, she kind of had two initiatives that she headed up as first lady. One was to get kids fit. The other was gardening. They had a nice garden at the white house and had some small high tunnel hoop houses as part of it. The high tunnel initiative kind of came out of this.
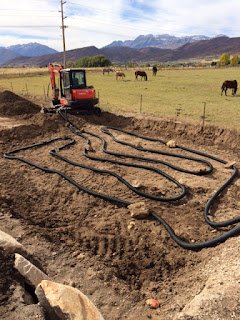
As you may recall, I put some pipe in the ground where this high tunnel will be going in about a year and half ago. This was added even before we moved into the house as near as I can recall. That pipe will be used as a geothermal system to help warm the hoop house during the night and cool it a little during the day. An inline fan will pull the hot air at the top of the high tunnel into the underground piping, heating the soil. At night, when it has cooled down in the high tunnel it will turn that inline fan on again and push warm air back into the high tunnel, using the warmed soil to heat that air that is going back into the high tunnel at the other end.
I also have four 50 gallon water barrels that will be painted black and put on the west side of the high tunnel. Those barrels will heat up during the heat of the day and then will release their warmth back into the high tunnel at night.
On Ralph's advice, I've also purchased a portal water heater (made for showering outdoors) that I'm going to use to warm the irrigation water that waters the plants in the early morning hours (about 5:00am), when the temp in the high tunnel will be at its lowest. Ralph said he was able to output water at about 80-85 degrees and the high tunnel warms right up after that and stays warm for a good while.
I'm hoping that between these three things, I can create an environment in the high tunnel that is more like the growers have in Ohio or Rhode Island, rather than what I have now at over a mile in altitude surrounded by mountains on all sides (it does make for some pretty views). My day time temperatures aren't too bad. By 1:00 to 2:00 it can start to get a little warm, but my highs on average are about 5 degrees cooler than Salt Lake. If I can get my average night time temperatures 5-10 degrees warmer and protect the plant from the wind, I should be in good shape.
There is going to be a lot to figure out this next season, since it is all new to me.


 Typically I would have started some seeds a week ago, but I only got these started two days ago, because life has been very busy lately. Using the paper towel method I started two 747 Johnson seeds. Those sprouted and I then put them both into one pot with two different brands of myco, Azos and some other beneficial bacteria. I also put a pinch of a WOW Super Start Pack in the seed starting mix. The day or day before I start my actual seeds I plan to grow this season, I'm pull the plants from this pot and mix the soil in the seed starting mix of my other pots, so each pot will get some of this more mature myco.

